Preacher's Guide for Video and Audio Recording
Our church has been meeting online for more than two months. We enjoyed singing, praying, and listening to the lessons from our leaders from all over the Philippines. Our new setup turned out to be an encouraging time to worship God with our families at home and online as the whole church during the lockdown.
For weeks to come, we still see the need to meet online due to the challenging nature of the COVID 19 pandemic. Until it is safe for our churches to worship together physically, our goal is to keep improving the quality of our videos so we can effectively deliver God’s message in our online services.
If you are a preacher tasked to prepare a video recording of your sermon, do not fear, your guide is here!
BEFORE RECORDING
- Prepare your message – People's attention span is generally shorter online compared to physical service, so be concise and share the exact message you want to communicate. Your goal is to speak intelligibly (1 Cor. 14:9, 19) so that your audience can significantly benefit from God's words
- Check camera and mounting – clean the lenses of your camera and ensure firm and stable support. A general rule of thumb, the camera lens should be level or placed slightly lower to your eyes
- Check and remove all possible background noise – like people talking, dog/s barking, electric fans, and aircon buzzing. Closing doors and windows may limit extra noise in your audio
- Check your attire – use plain colored clothes that have an excellent contrast to your background (e.g., the shirt is light, the background is darker or vice versa). Shirts with collars are advisable
- Check your background – plain colored background is advisable. You can also use your home library or living room area as backdrops as long it is not too distracting, very casual or messy
- Check your audio – do a sample recording, and check if the volume is ok, make adjustments otherwise. See the audio guide and equipment recommendation below. Using a USB mic, a lavalier mic, or even your mobile phone headset can improve your audio quality
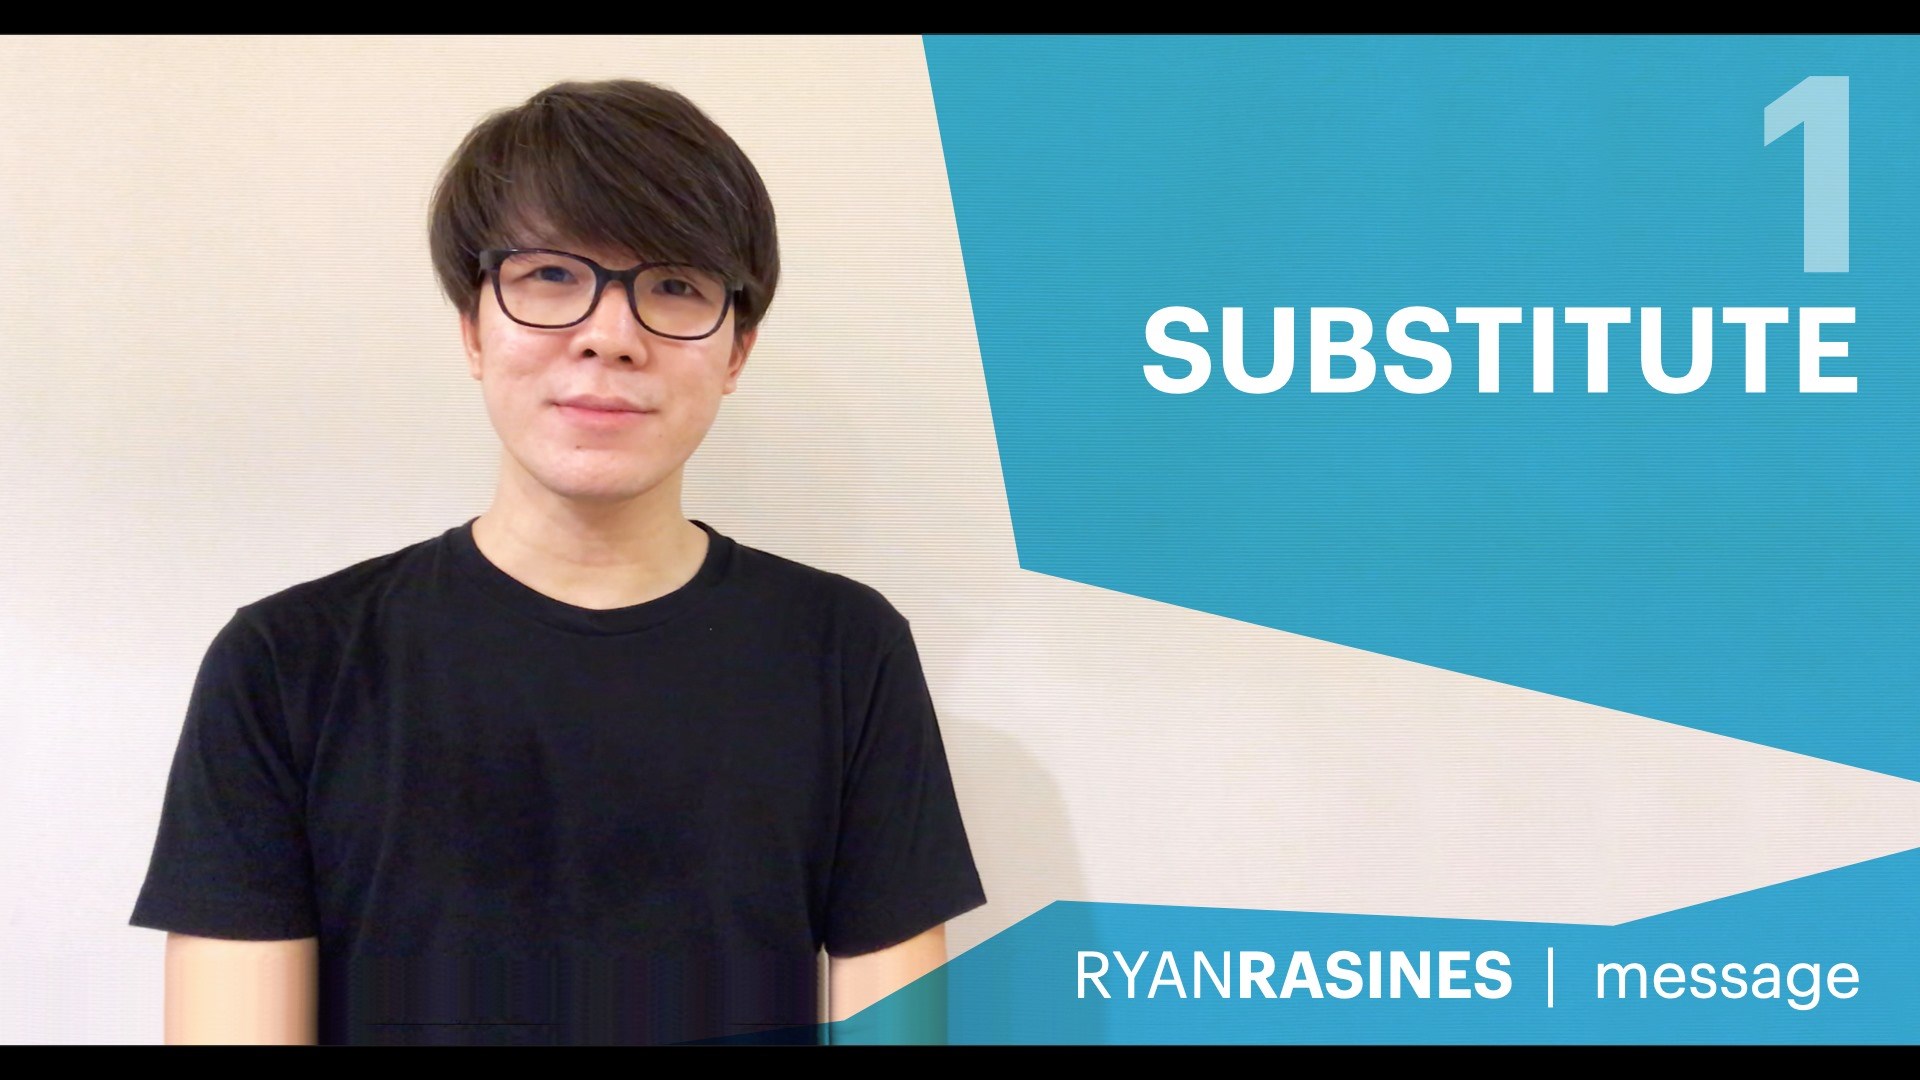
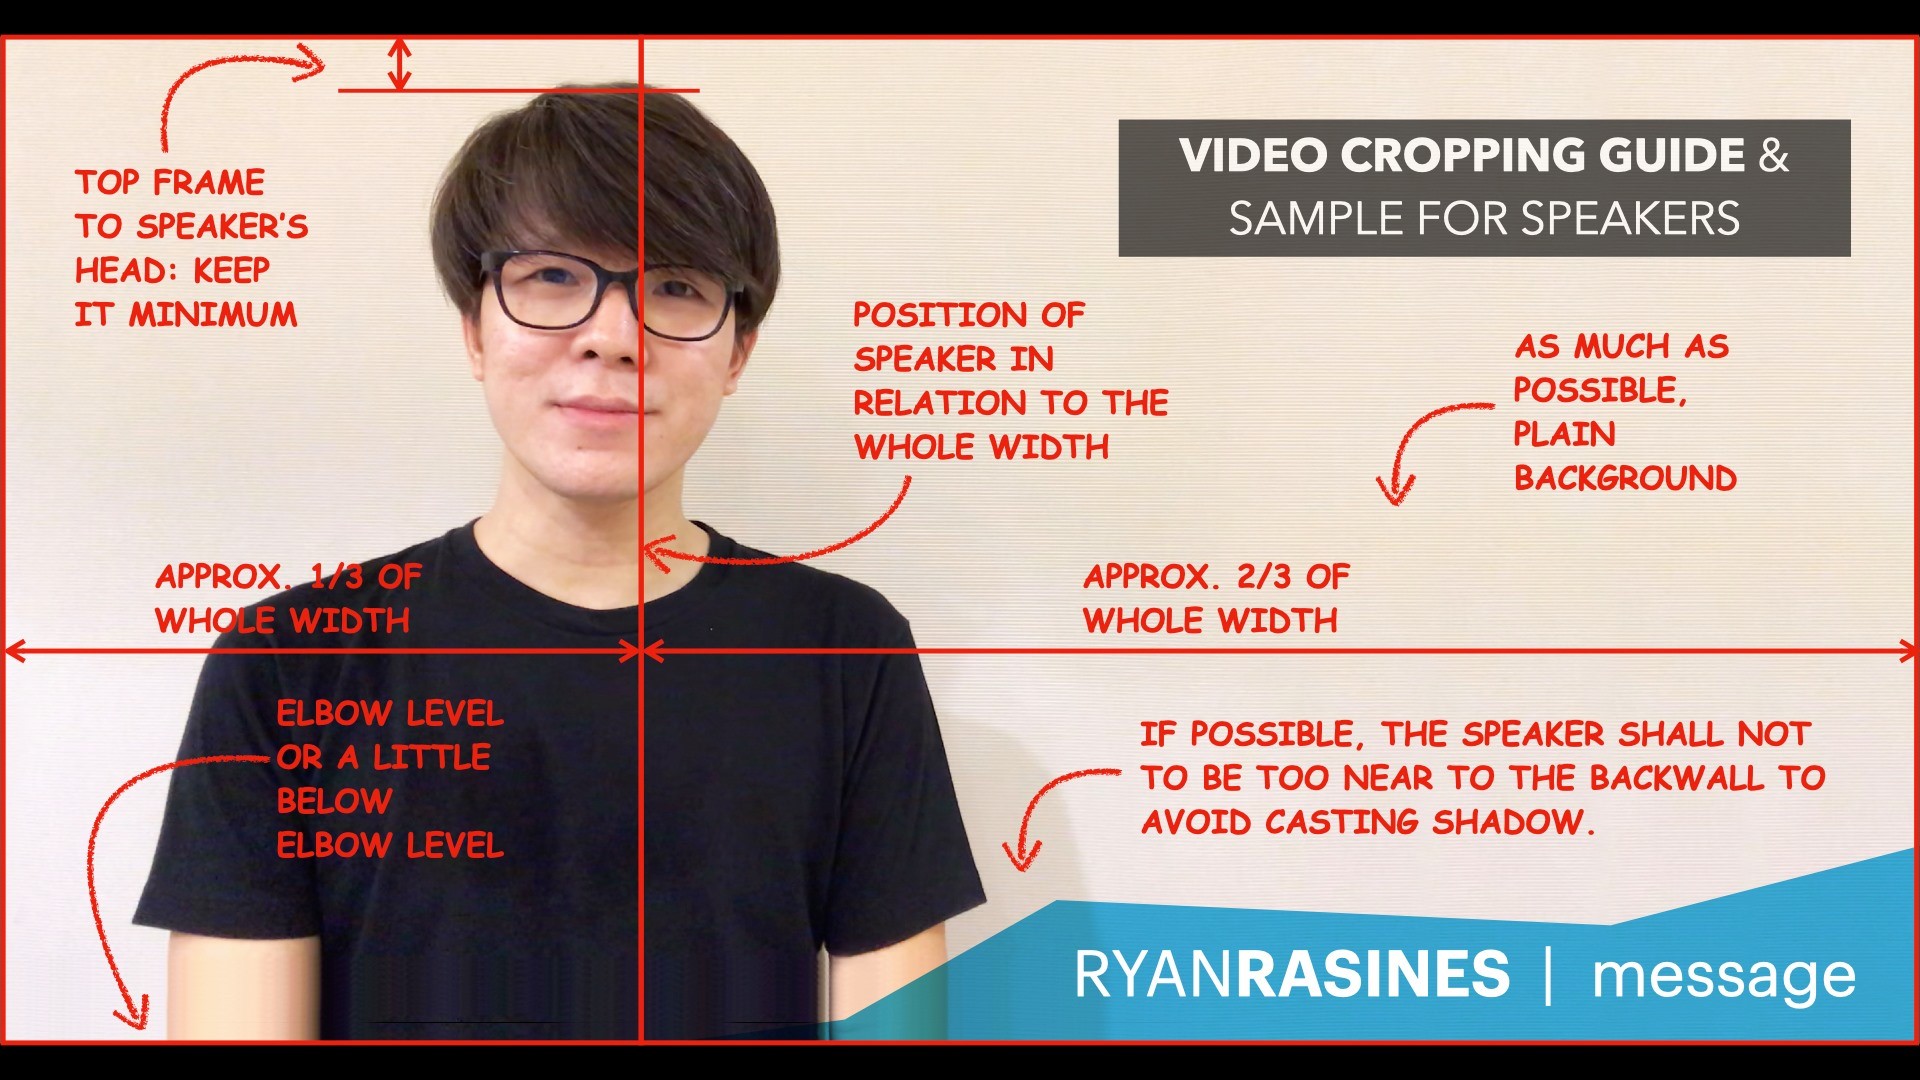
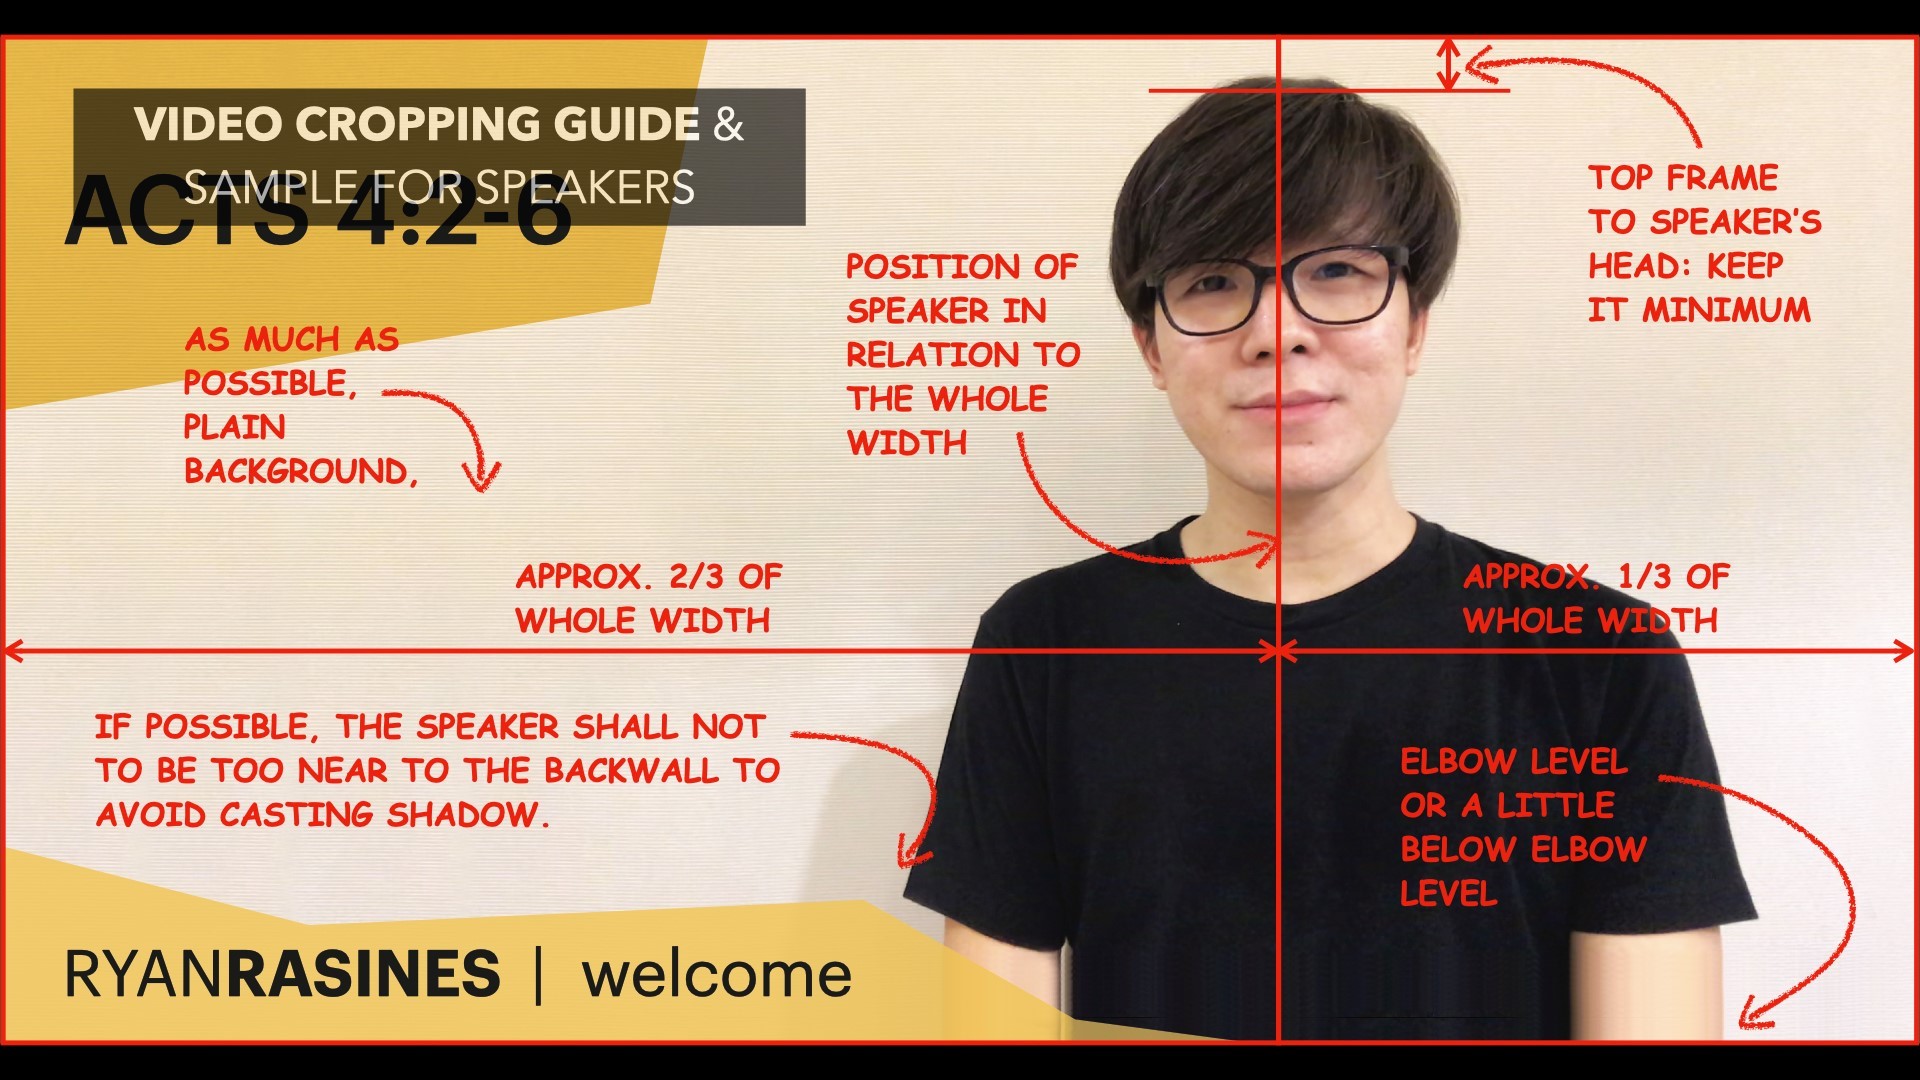
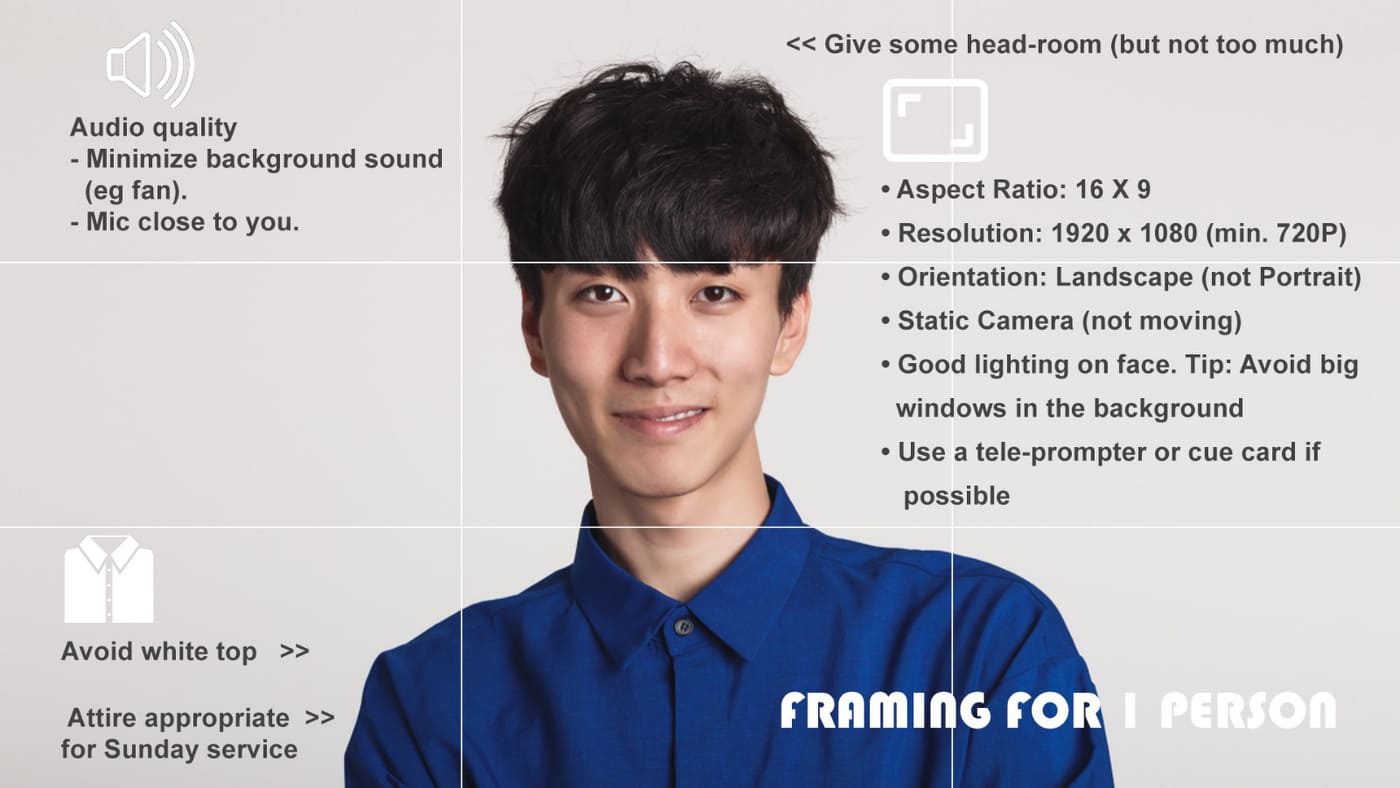
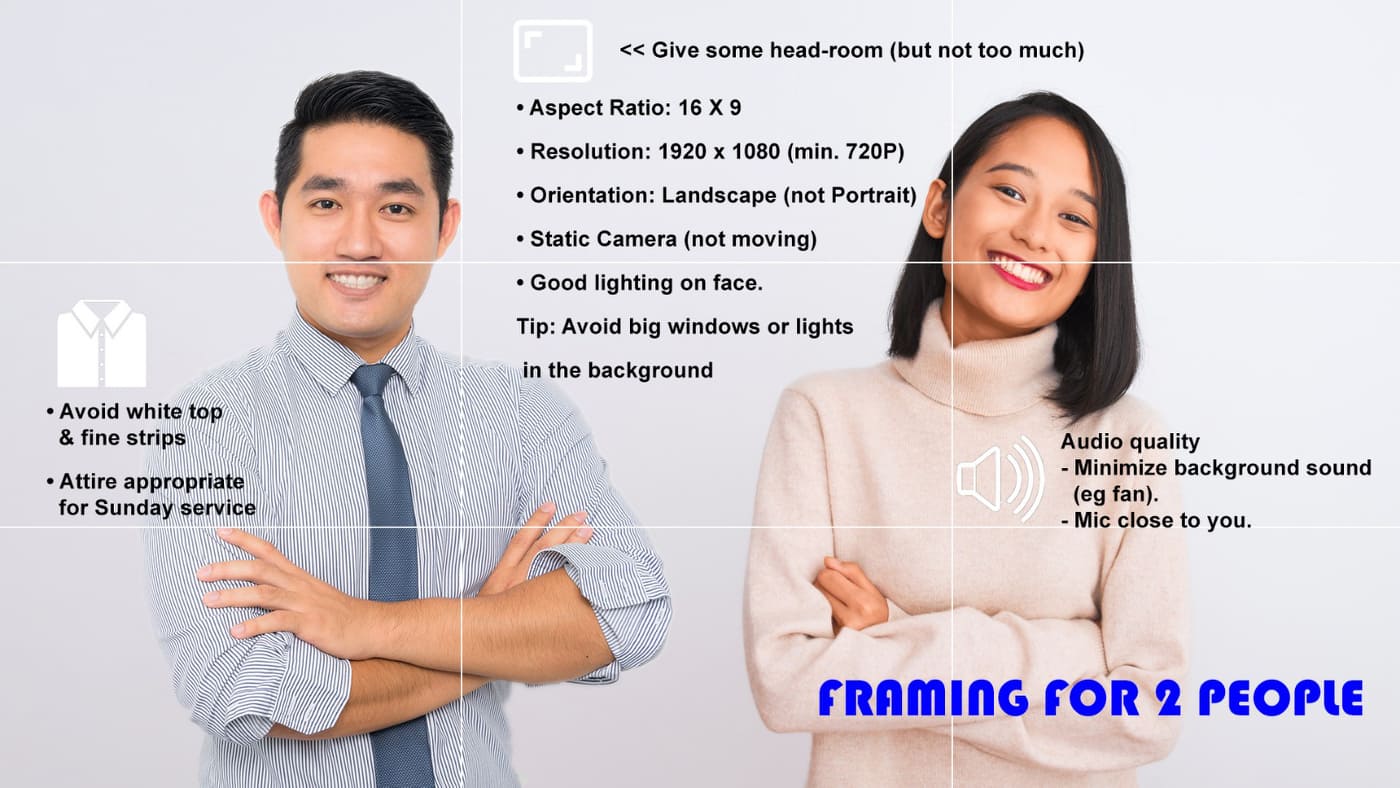
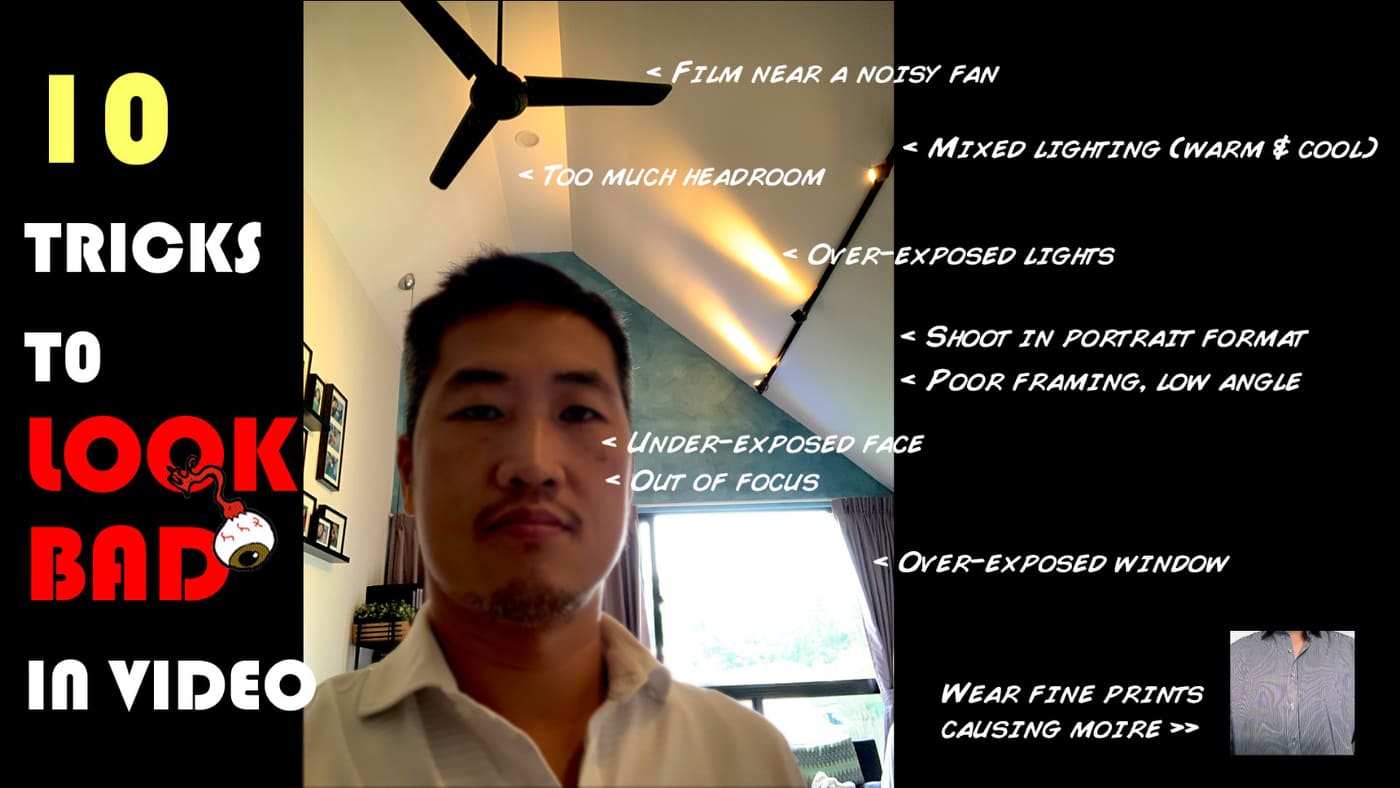
- Check your framing and cropping – See our guide below
DURING RECORDING
- Maintain eye contact – look straight at the camera lens of your recording device. Picture yourself looking at your audience as if their right in front of you.
- Do not place your notes on top or way below the camera. Your audience may be distracted on the direction where your eyes are looking
- If you need a script, try to place it as close as possible to the camera so that you don’t have to glance too far from the lens to read it
- It will also help if you organize your thoughts and know your lines ahead of time, limiting the times you need to glance and read your notes. It will take some practice, but it will be much better since you can stay focused more on your audience than on your notes
- Consider using a teleprompter app that allows you to show your notes on your phone while you are recording. There are many versions out there for both iPhone and Android devices
- Maintain voice volume
- Be lively and dynamic in your delivery – smile if necessary, pause to emphasize important points and take time to speak or read clearly
- Use appropriate hand gestures – this will highlight your point, observe an open stance, where you stand relaxed and with open arms, be welcoming to your audience
- Start and End of recording – allow 3 seconds of airtime before and after you speak
- Take 1, Take 2, Take 3… – it is challenging for any recording to be perfect in one take, so be very patient and consider recording again and then choose the best version you like
AFTER RECORDING
- What to send – to maintain quality and standards in our online sermons, we encourage you to send
- For the main sermon - unedited and raw video recording and word file of your sermon
- For other segments – (Welcome, Communion, Benevolence, Response/Announcement) kindly indicate in your email the scripture you used for your lesson
- Where to send: icocph.media@gmail.com
- When to send: Every Monday at 12nn
- How to send: Send through your email or use filesharing websites like WeTransfer for bigger files
With regards to audio recording, here are some recommendations from ICOC Teacher Malcolm Cox, who has been doing podcasts and other audio recordings for many years. You can find his sermons and podcasts on his website https://www.malcolmcox.org.
- Microphone.
- Simple USB microphones are not very expensive but improve audio quality for your listeners significantly.
- Years ago, I used an earlier version of this microphone. Any of the “Blue” range is pretty good.
- If you are using a USB microphone that sits on your desk, bear in mind if you bang your desk, it will be very audible. Ways around this include fixing it to your screen (as seen in the link above), or placing it on top of some absorbent material like a folded towel. That will absorb most knocking sounds.
- The next level up is to put your USB microphone on a boom stand. My current setup is the Rode NT-USB Microphone, on a boom arm clamped to my desk. Such a setup reduces the chances of disturbing sounds such as knocking one’s desk. You could also mount it on a traditional microphone stand separate from your desk.
- If your microphone does not come with a pop filter (see example here), I would strongly suggest getting one. It will reduce plosives (P, D, etc.).
- In addition, I would strongly suggest investing in a wind cover (see example here). Although primarily intended for outdoor use, I find that the combination of pop filter and wind cover reduces the plosives significantly.
- Simple USB microphones are not very expensive but improve audio quality for your listeners significantly.
- Headphones.
- You’re better off using headphones than letting the audio come through your computer speakers. That way, you minimize the chances of feedback and the muddy sound caused by someone the other side not having muted their mic.
- My current setup is the Jabra Pro 930. This is overkill for most people’s needs, but I use it as a dictation microphone as well as a headphone. I like it because it is light, and connected via Bluetooth (gets rid of a cable). You can use it as a microphone, but I wouldn’t use it for preaching if you have a USB microphone available. The sound quality on the USB mic is much better than the Jabra. The Jabra is fine for casual conversations and dictation.
- You’re better off using headphones than letting the audio come through your computer speakers. That way, you minimize the chances of feedback and the muddy sound caused by someone the other side not having muted their mic.
- Speaking via smartphone
- To be honest, if you’re speaking, you really need to use a computer rather than your phone. You will find it much easier to speak into a larger screen, and, assuming you are wired into your network directly, the signal will be more reliable and clear.
- However, in some circumstances, we may have to speak using our phones. All is not lost!
- If you do use your phone, I suggest purchasing a good quality lavalier microphone (clip-on).
- This Rode is good. I’ve used it many times. You will need an adapter for the iPhone.
- If you want top-quality, then this Sennheiser is awesome.
- And if you want to be really sophisticated, consider going wireless.
- To be honest, if you’re speaking, you really need to use a computer rather than your phone. You will find it much easier to speak into a larger screen, and, assuming you are wired into your network directly, the signal will be more reliable and clear.
- Sitting: easier to have your Bible, notes, and everything else to hand on the desk. But can tend to lose energy and slump in the chair.
- Standing: easier to maintain energy levels. Need to be more disciplined about not moving out of camera shot.
One other thing – have a think about whether it’s better to sit or stand when you speak. There are advantages and disadvantages to both.
In general, I find that standing is better when talking to a bigger group.
As you can imagine, there is a vast range of equipment and a variety of setups. If you have found something that works particularly well, please let me know.
It really is worth improving sound quality. You might not notice it your end, but your listeners certainly will. And the point, as we all know, is not just to speak well, but to be heard well. Otherwise, there’s not much point!
God bless, Malcolm
As an added bonus, below are some visual guides for your video recording from the media teams of ICOC Cebu and ICOC Singapore.
Thank you
- ICOC Philippines media teams from Manila and Cebu for this recording guide
- Haraya De Mata - Haraya Multimedia for the article image
- ICOC Singapore Media Team for additional tips in video recording
- Malcolm Cox Teaching Ministry – for audio equipment recommendation and other tips